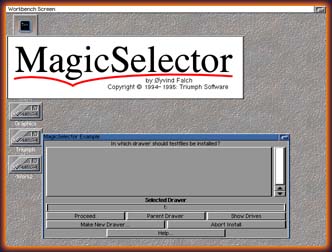
The option file is in standard text file and must have an enter at the end of every line. like this example of an prefsfile:
1
0
0
8
000
25
010
050
| Example | Valid Values | Default value without .prefsfile | Description of the Controls |
|---|---|---|---|
| 1 | 0-9 | 1 (Placement map) | Placement of the InstallerFX window |
| 0 | 0-1 | 0 (Borderless = off) | Borderless on the InstallerFX window ON/OFF |
| 0 | 0-1 | 0 (Tile = off) | Tile Support |
| 8 | 0-9 | 8 (Placement map) | Placement of the Installerprogram window |
| 000 | 000-999 | 000 (No Anim) | WaitFrame: Uses for slideshow and very slow anim. If you want an animation using AnimFrames Per Second, you need to set this value to 000. |
| 25 | 00-99 | 0 (No Anim) | AnimFrames Per Second: Nice values is 10,15,25,30 and up. If Animframes Per Second is set to 000, WaitFrame is set to 005. If you have an animation you need to set WaitFrame to 000. When this value is high the amount of cpu usages is higher |
| 010 | 000-999 | 000 (No Anim) | Number of frames in the Animation: InstallerFX will calculate the animpicture size like this: Widht of the picture/AnimFrames = AnimFrameWidth. |
| 050 | 001-999 | 000 (No Anim) | AnimLoop: Number of loops before the anim stops. |
If the prefsfile is missing, InstallerFX will use the default values shown in the table.
Go here is more detailed information about how to make an Animation or a Slideshow.
InstallerFX splits the Workbench Screen up in 9 different zones shown on the picture to the right. If you have 0 in the prefsfile, the windows will not be moved from the current position. As default the InstallerFX window will be placed at the "1" placement which is at the top left of the screen, and the Installer Window will be placed at "8" which is at the bottom right.
|
 |
| The Workbench can then look like this:
The InstallerFX window will always be placed at the lowest possible value if it could not be placed at the correct position: When you are changing the picture by replacing you current picture, you can also change the .prefs file and move the windows to other positions during the installation procedure. You can check this out in the examples: |
 |
You can see that the InstallerFX window have a border on the window, it is an standard window border. It is possible to turn off the border if you like the window without a border. You can see an example of this below with the Tile example.
| You can have a tiled background. The main reason to include this option
is that a large background picture takes a lot of space in an archive. It
should be possible to make Installer scripts with full size backgrounds and
still have small archives.
When this option is on you will get a full screen sized window, and the picture will be tiled all over the window. After the tile procedure your Installer window will be brought to front. You have to wait until the background is loaded before you can load some other pictures/logos to the same screen. Sorry for the Windows Look ! |
 |